Kommo + onlinePBX (Eng. vers)
Содержание 6
Integration with Kommo allows you to increase the efficiency of managers by combining the capabilities of a virtual PBX with the functionality of a CRM system to manage your sales.
Настройка интеграции на русском языке — в отдельной статье.
In addition, you get all the benefits of our virtual PBX:
- The ability to connect any IP telephony operator.
- Many services: voice greeting and menu, time and number rules, voice mail and more.
- Functional API.
- Own mobile application for calls.
- Mobile application for onlinePBX administrators.
The system is simple, with a pleasant interface. It has a low entry threshold: managers can figure it out on their own. Thanks to this, the transition from Excel to a full-fledged CRM system is fast.
For us, integration with Kommo is the flagship. Other integrations are inferior in terms of capabilities.
What do you need to know about Kommo integration?
Integration of onlinePBX with Kommo provides the following features:
- Maintaining the call history in the client's card.
- Ability to listen to recorded conversations directly from history.
- Pop-up card with the ability to quickly create a contact.
- Distribution of incoming calls by responsible persons.
- Click to call.
- Create leads for outgoing, incoming and missed calls.
- Creating tasks for missed calls.
- An exclusive built-in program for calls from Kommo. You will only need a headset.
- Automatic creation of contacts for incoming and outgoing calls.
- «Undelivered» for incoming and missed calls.
- «Multi-pipelines»: setting up pipelines for external numbers.
Integration setup
Integration is not enabled on Kommo accounts with a negative balance.
What will be needed:
Step 1. Connecting the onlinePBX widget to Kommo
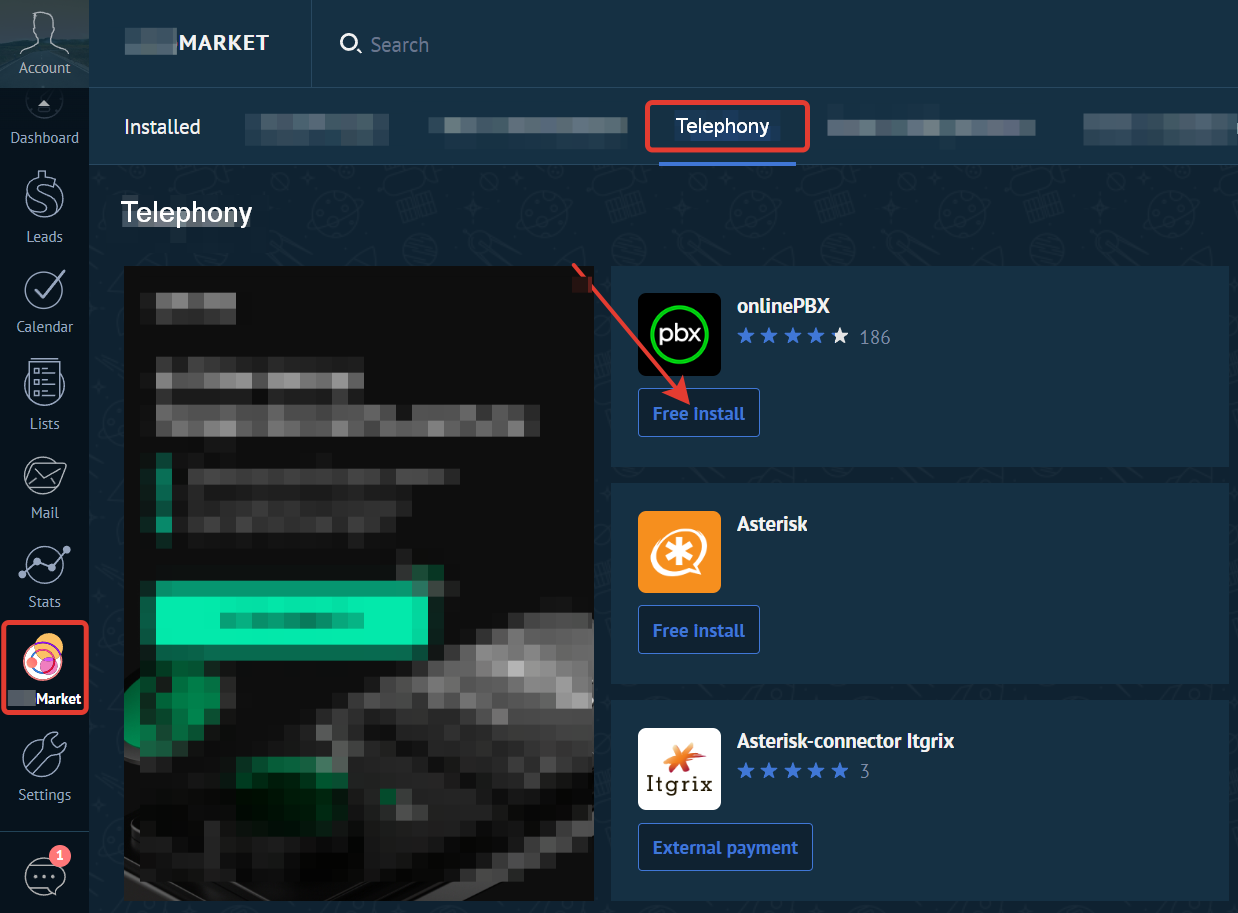
Go to Market> Telephony. Next, find the «onlinePBX» widget, click «Free install».
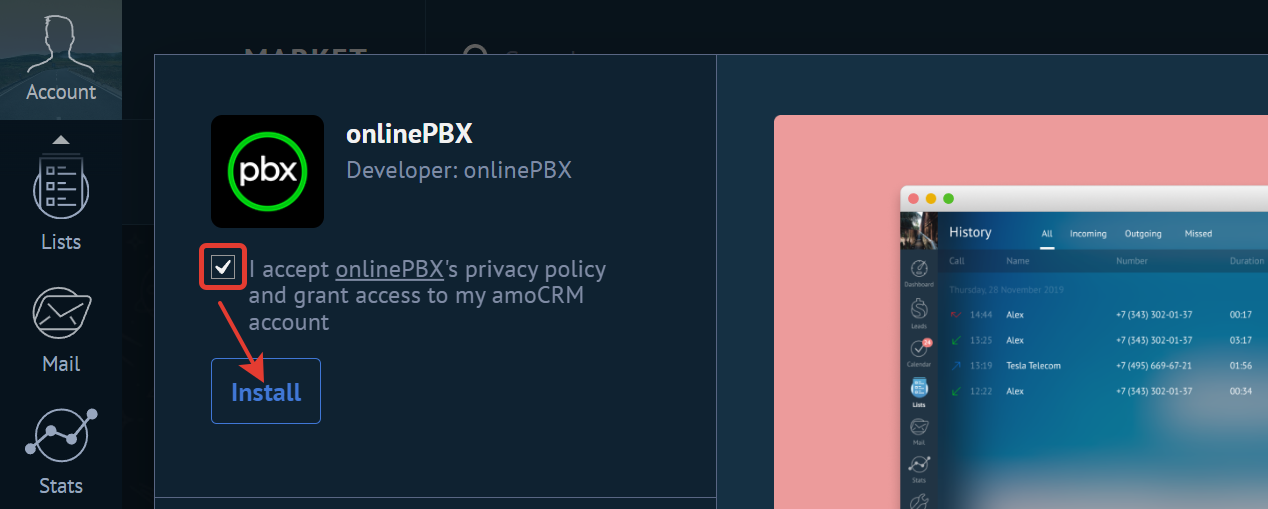
_A widget window will open. Check the box next to «_I accept onlinePBX's privacy policy and grant access to my Kommo account». Click «Install».
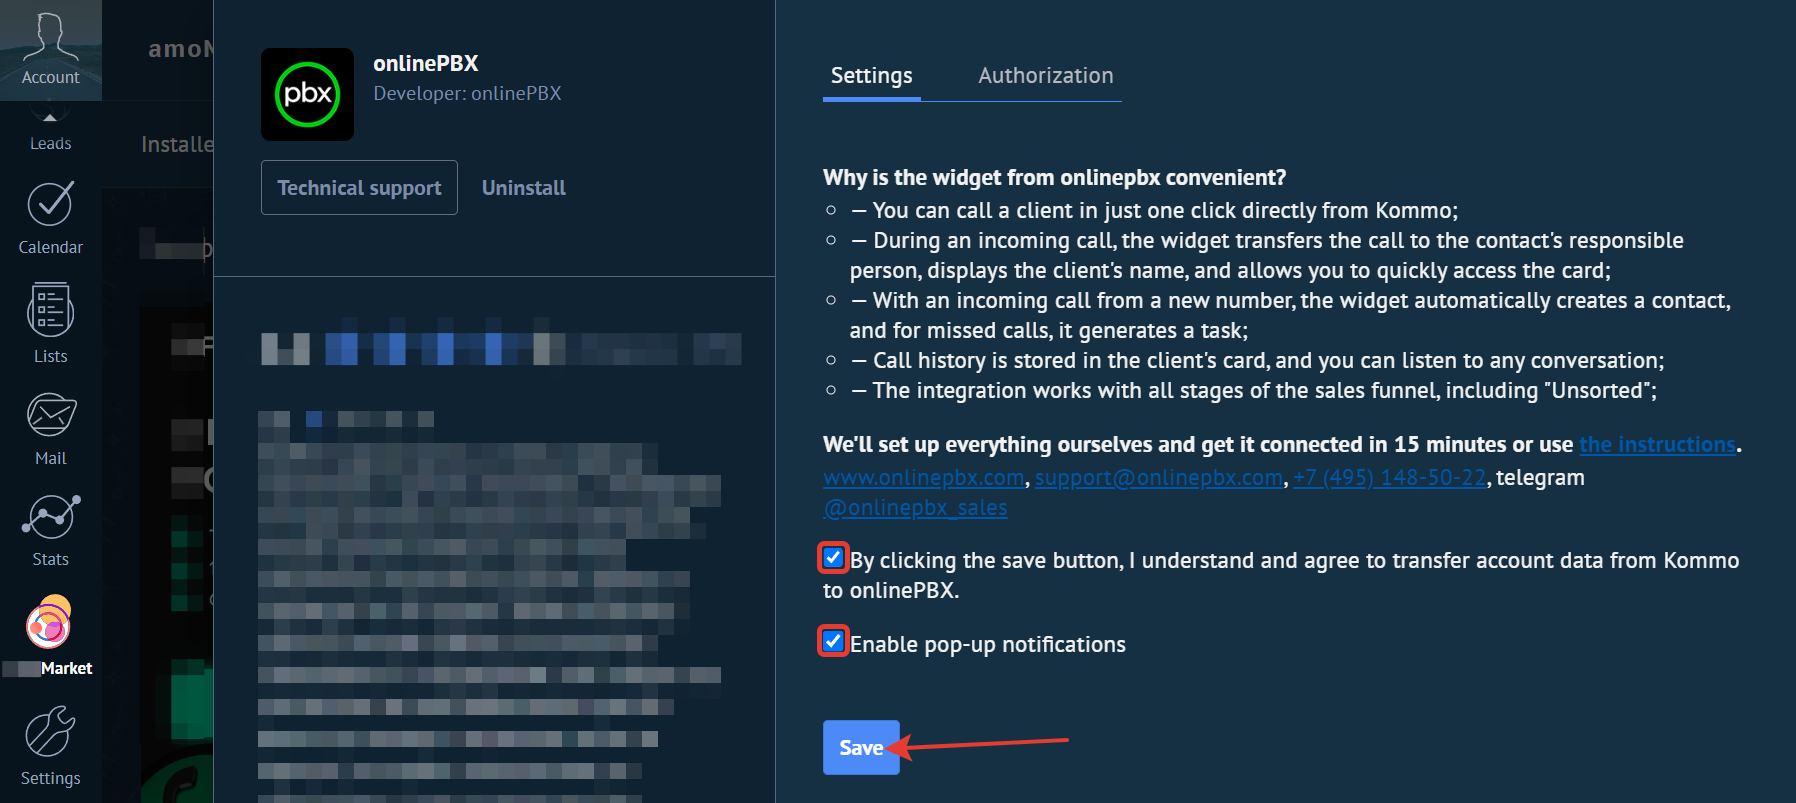
A description window opens. Check two boxes at the bottom of the description. Click «Save».
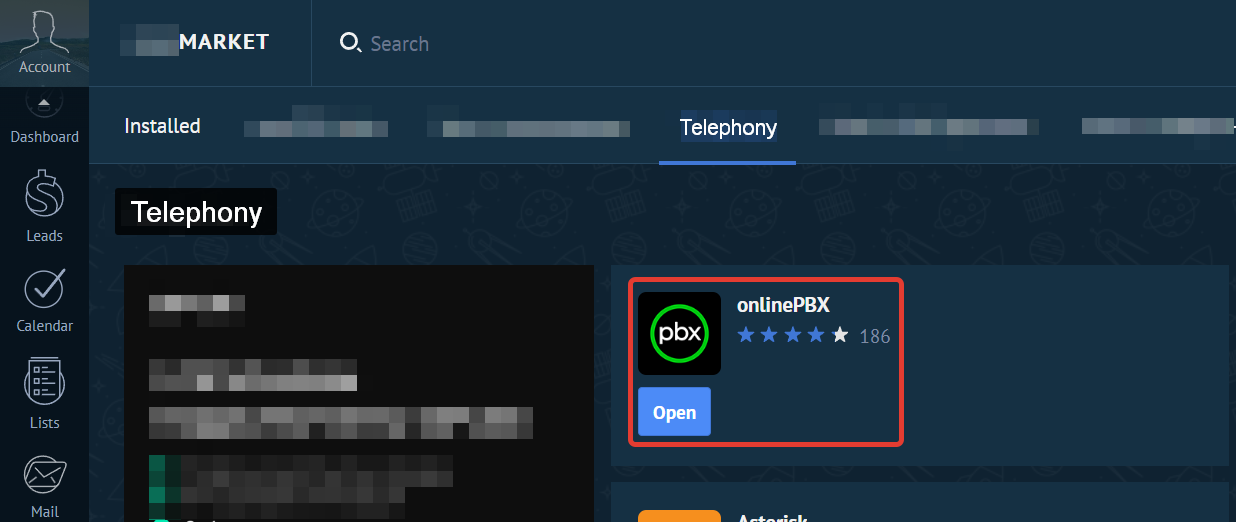
After saving, you will be able to open the installed widget.
Step 2. Enabling onlinePBX Integration
The following pages should be open in the browser: the onlinePBX control panel and administrative access to the Kommo account.
To configure it, go to Integration> Kommo. Click «Connect».
In the new window, select the email address to which the desired Kommo account is registered. Click «To allow».
Done. Integration is enabled.
Step 3. onlinePBX Integration Settings
If «Step 2» is completed correctly, two new tabs will appear in the Kommo subsection — «Settings» and «Users».
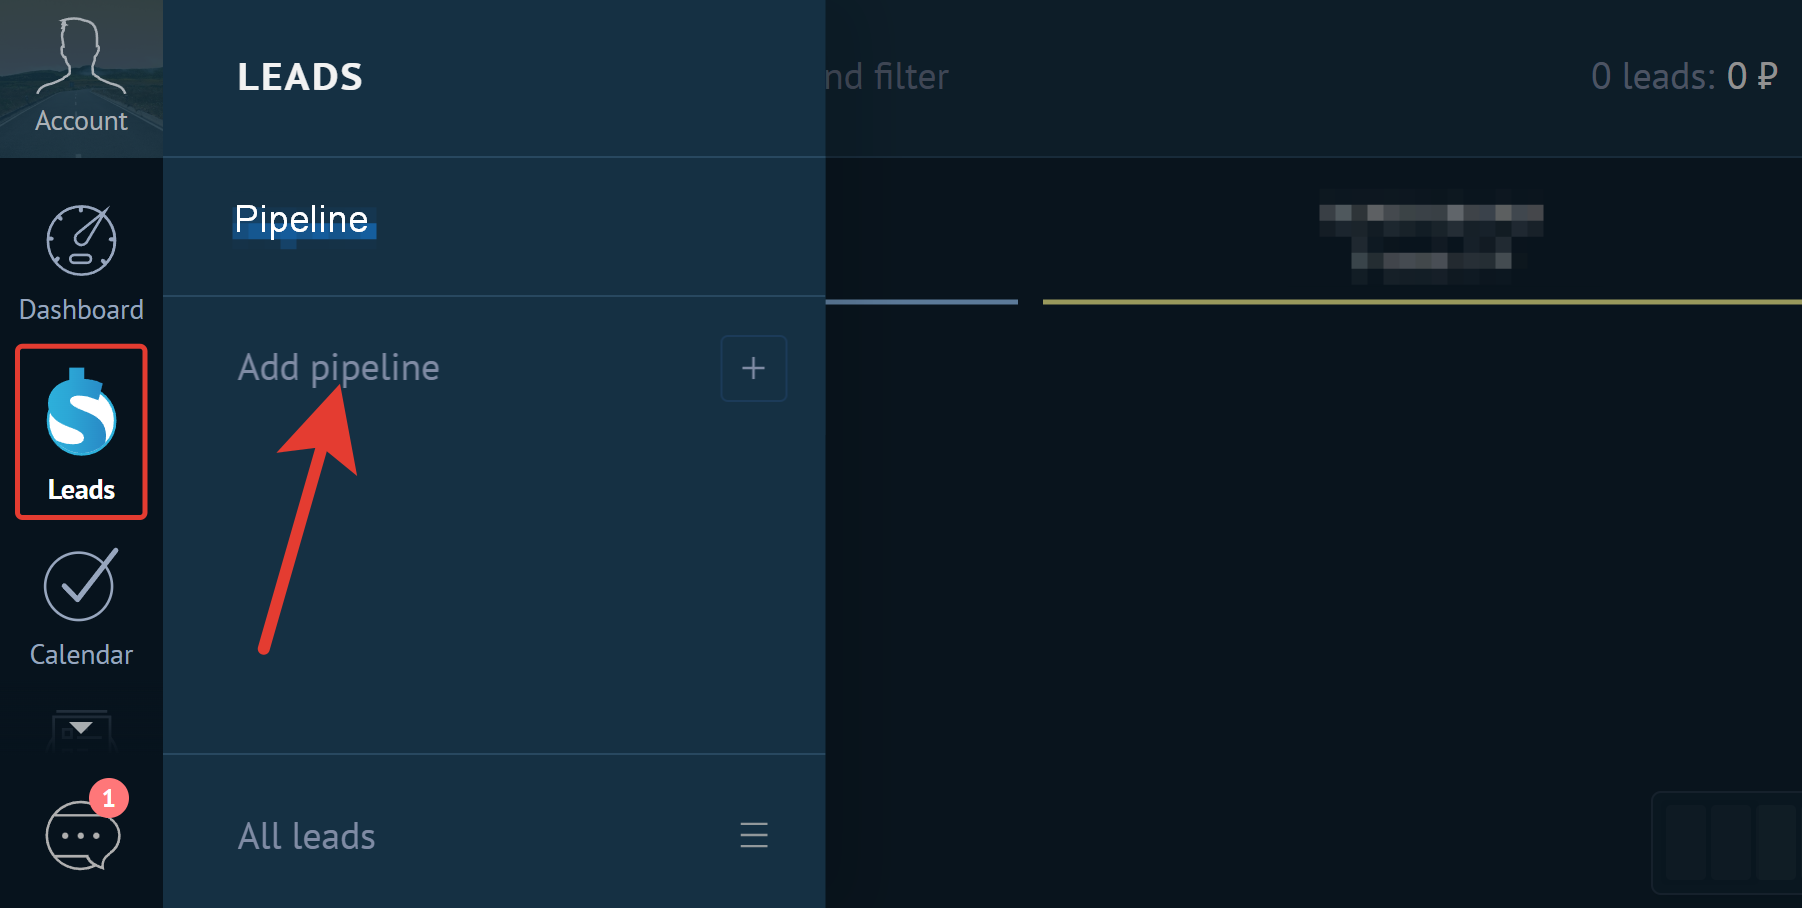
In the Kommo personal account, go to the «Leads» section. Next, click «Add pipeline». Create the pipelines you need for your work.
In the onlinePBX personal account, go to Integration> Kommo > Settings. In the «Pipeline» field, select the pipeline for which you want to configure entities. External numbers are automatically indicated next to the pipeline name, which are linked to the selected pipeline. In the «External numbers» field select a number, events about calls to this number will be recorded in the selected pipeline.
Pipeline configuration features:
- If the external number is not specified in any pipeline, integration will not work for it.
- The external number can only be specified for one pipeline.
- Several external numbers can be specified in one pipeline.
- Each pipeline is configured separately.
- By default, the numbers are not selected.
Next, select and fill in the necessary items:
- «Incoming» — Is the setting for incoming calls. Choose what to create in Kommo for incoming calls: contacts, leads and contacts, or «Unassembled».
- «Outgoing» — Settings for outgoing calls. Choose what to create in Kommo for outgoing calls: only contacts or leads and contacts..
- «Missed» — Missed incoming calls. Choose what to create in Kommo for missed calls: contacts, leads and contacts, or «Неразобранное».
- «Default Owner» — Assign a default responsible person. Unique missed calls will be recorded on it and it will be responsible for the entities created by the call.
- «Deal pipeline stage» — New leads will be placed at the stage you specify.
- «Additionally»:
- «Download call recordings» — select the format in which calls should be uploaded to Kommo: «Don't download» — the call recording will not be loaded_;_ «The whole call» — the whole call is loaded (beeps, conversation, hold) and the time of the whole call is displayed; «Just a conversation» — the whole call is loaded (beeps, conversation, hold), and only the time of the conversation is displayed;
- «Create tasks based on missed ones» — enable it if you want to automatically receive tasks for missed calls.
- «Specify default owner if there is no match» — enable it so that if there is no match, the responsible person is specified by default. If the item is not selected, calls will not be uploaded and contacts/leads will not be created in Kommo.
- «Create a new lead if the previous one is closed and successfully implemented» — enable it if you want a new lead to be created if the lead is successfully completed on the contact.
- «Create a new lead if the previous one is closed and not implemented» — enable it if you want a new lead to be created if the lead on the contact is not completed.
- «Add a tag with call type» — Tags will be added to the created entities: contacts, companies and leads. If you answered an incoming call, the tags with the names «Incoming» + «Answered». If you did not respond to an incoming call, the tags with the names «Incoming» + «Missed». If the call is outgoing, the tag is «Outgoing». Tags are updated according to the type of the last call.
- «Add external number name as a tag» — the tag with the name of the external number is added (from the "Name" field in the settings of the external number). If there is no name, an external number is added (data from the "Number" field).
- «Merge new contacts and leads with existing ones» — new contacts and leads will be automatically merged with existing ones, while duplicates will not be created. If the function is disabled, duplicates of leads will be created (if the existing ones do not have related contacts or companies), the call will be uploaded to the contact/company and the missed task will be uploaded to the created lead.
Click «Save».
You cannot specify a pipeline for the «Undelivered». All «Undelivered» entities will fall into the first stage of the pipeline by default.
Features of working with a lead:
- The user who last talked to the client will be responsible for the automatically created transaction at the end of the conversation.
- During the conversation, the change of the responsible person in the transaction will not be saved.
Next, go to the «Users» tab. Match onlinePBX users and employees in Kommo. Click «Save».
When changing integration settings, the changes will take effect within 10 minutes.
The integration will not work correctly if a custom field PHONE is created in Kommo contacts.
If you use the Blacklist module, blocked calls will not be uploaded to Kommo (this rule starts working 10 minutes after adding the number to the blacklist).
Didn't find the answer to the question?
Contact technical support:
+7 (495) 669-67-21
+7 (343) 302-01-37
+7 (812) 646-51-40
E-mail — support@onlinepbx.ru
Тelegram — techpbx_bot